A flat tire is never part of the plan. It’s stressful, inconvenient, and can feel overwhelming, especially when you are in a rush. A flat tire can happen anywhere…on the road, in a parking lot, or even at home.
And when it happens, knowing how to change a tire saves you time, money, and a lot of frustration. It is a basic skill every driver and cyclist should have.
If you haven’t done it before, don’t worry. This article will guide you on how to change a tire safely and how long it may take.
So, without wasting further time, let’s get started.
Why You Should Learn How to Change a Tire
Flat tires almost never happen at a good time. Roadside assistance can help, but it is not always available. On highways or in remote areas, you might wait hours for help to arrive. Sometimes there is no signal at all.
Knowing how to change a tire lets you handle the problem on the spot and get back on the road.
Changing a tire yourself can:
- Save time by avoiding long waits for roadside help
- Save money by skipping service or towing fees for a simple fix
- Protect your car by stopping you from driving on a flat and damaging the rim or suspension
- Improve safety by getting your vehicle out of traffic faster
This skill is especially useful for new drivers who may not have breakdown experience yet, and for cyclists who ride far from repair shops or help. In both cases, knowing how to change a tire can turn a stressful situation into a short delay instead of a long and risky one.
How to Change a Tire Step by Step
Step 1: Find Your Tools
Before you touch a single bolt, find your tools. Most cars store them together in the trunk, usually under the floor panel.
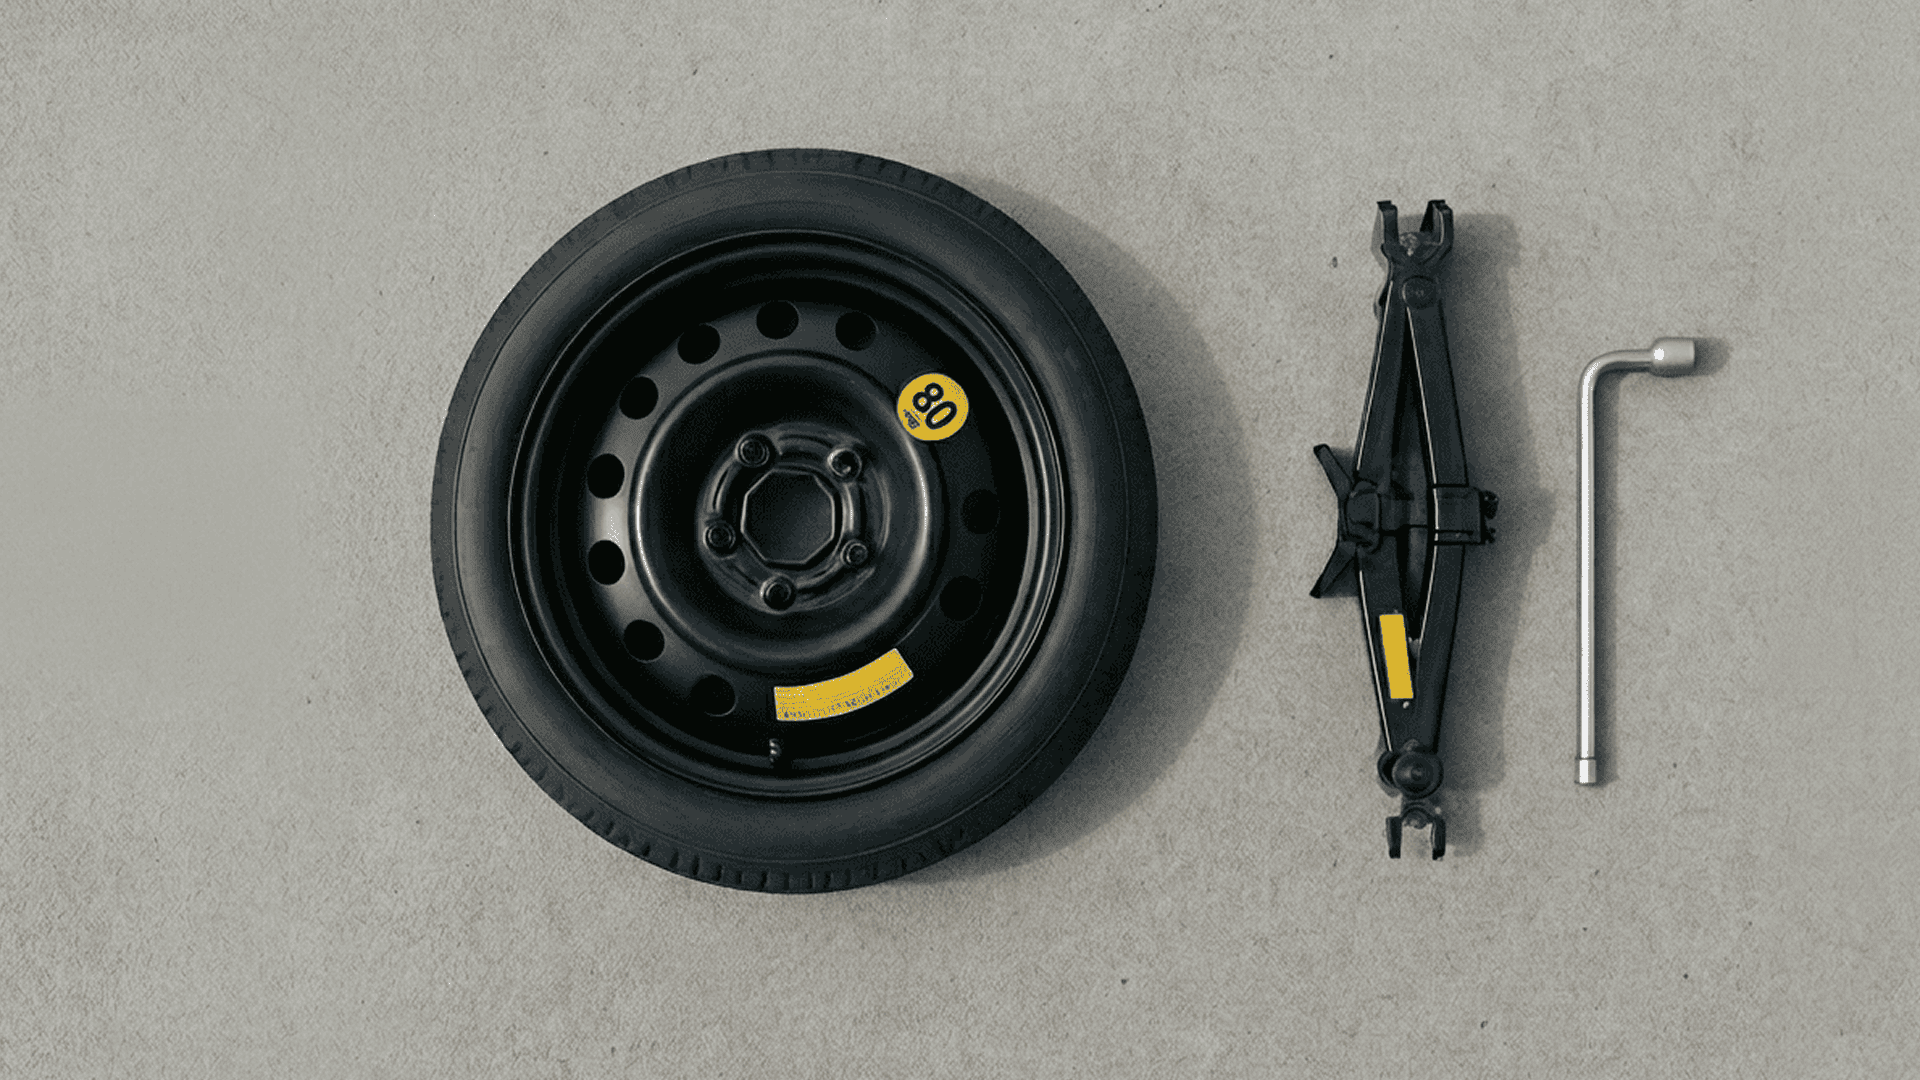
You are looking for three things:
- The spare tire
- The jack (a metal tool that lifts the car)
- The lug wrench (used to loosen and tighten the wheel bolts); shaped like an X or an L
In many cars, you lift the trunk floor and remove a simple fastener to reach them. If you are not sure where yours are, check your owner’s manual.
Now that you’ve found your tools, here is a crucial piece of advice: spare tires lose air over time. A flat spare is a common reason a roadside tire change fails. Check your spare’s pressure every six months at a gas station air pump. That way, it is ready when you need it.
Step 2: Create a Safe Zone for Your Car
Your first priority is safety. If possible, move your car to a flat, solid surface and as far from traffic as you can to change a flat tire.
Never attempt to change a tire:
- On a hill
- On soft ground like dirt or grass
The jack needs a solid and level surface. If the ground is unstable, the car can slip or fall.
Turn on your hazard lights right away. This makes your car easier for other drivers to see.
On top of that, make sure the car cannot move:
- Put the car in Park (automatic) or in gear (manual)
- Engage the parking brake fully
For extra safety, chock a wheel. This means placing a heavy object behind a tire to block it from rolling. If your front right tire is flat, chock the rear left tire. A proper wheel chock is best, but a brick can work too. Once the car is stable, you are ready to work on the wheel.
Step 3: Loosen Lug Nuts Before Lifting the Car
Now that your car is completely stationary, you’ll prepare the wheel for removal. However, before lifting the car, loosen the lug nuts. This is critical.
The car’s weight on the ground keeps the wheel from spinning. If you try to loosen the nuts after lifting the car, the wheel will just spin in the air.
If there is a hubcap, remove it first. The flat end of the lug wrench works for this.
Place the wrench on a lug nut and turn it counter-clockwise to loosen it. Remember the old saying: “righty-tighty, lefty-loosey.”
You are not removing the nuts yet. Just break them loose with about a half turn. It’s very common for these nuts to feel stuck, especially if they were put on with a power tool at a shop.
You can use your body weight to loosen stuck nuts. Position the wrench on the nut so that the handle is mostly horizontal. Carefully, while holding onto the car for balance, use your foot to press down firmly on the wrench handle.
Do this for each lug nut. Once all the nuts are loose, stop. Now the wheel is ready to come off safely.
Step 4: Safely Position the Jack and Lift Your Car
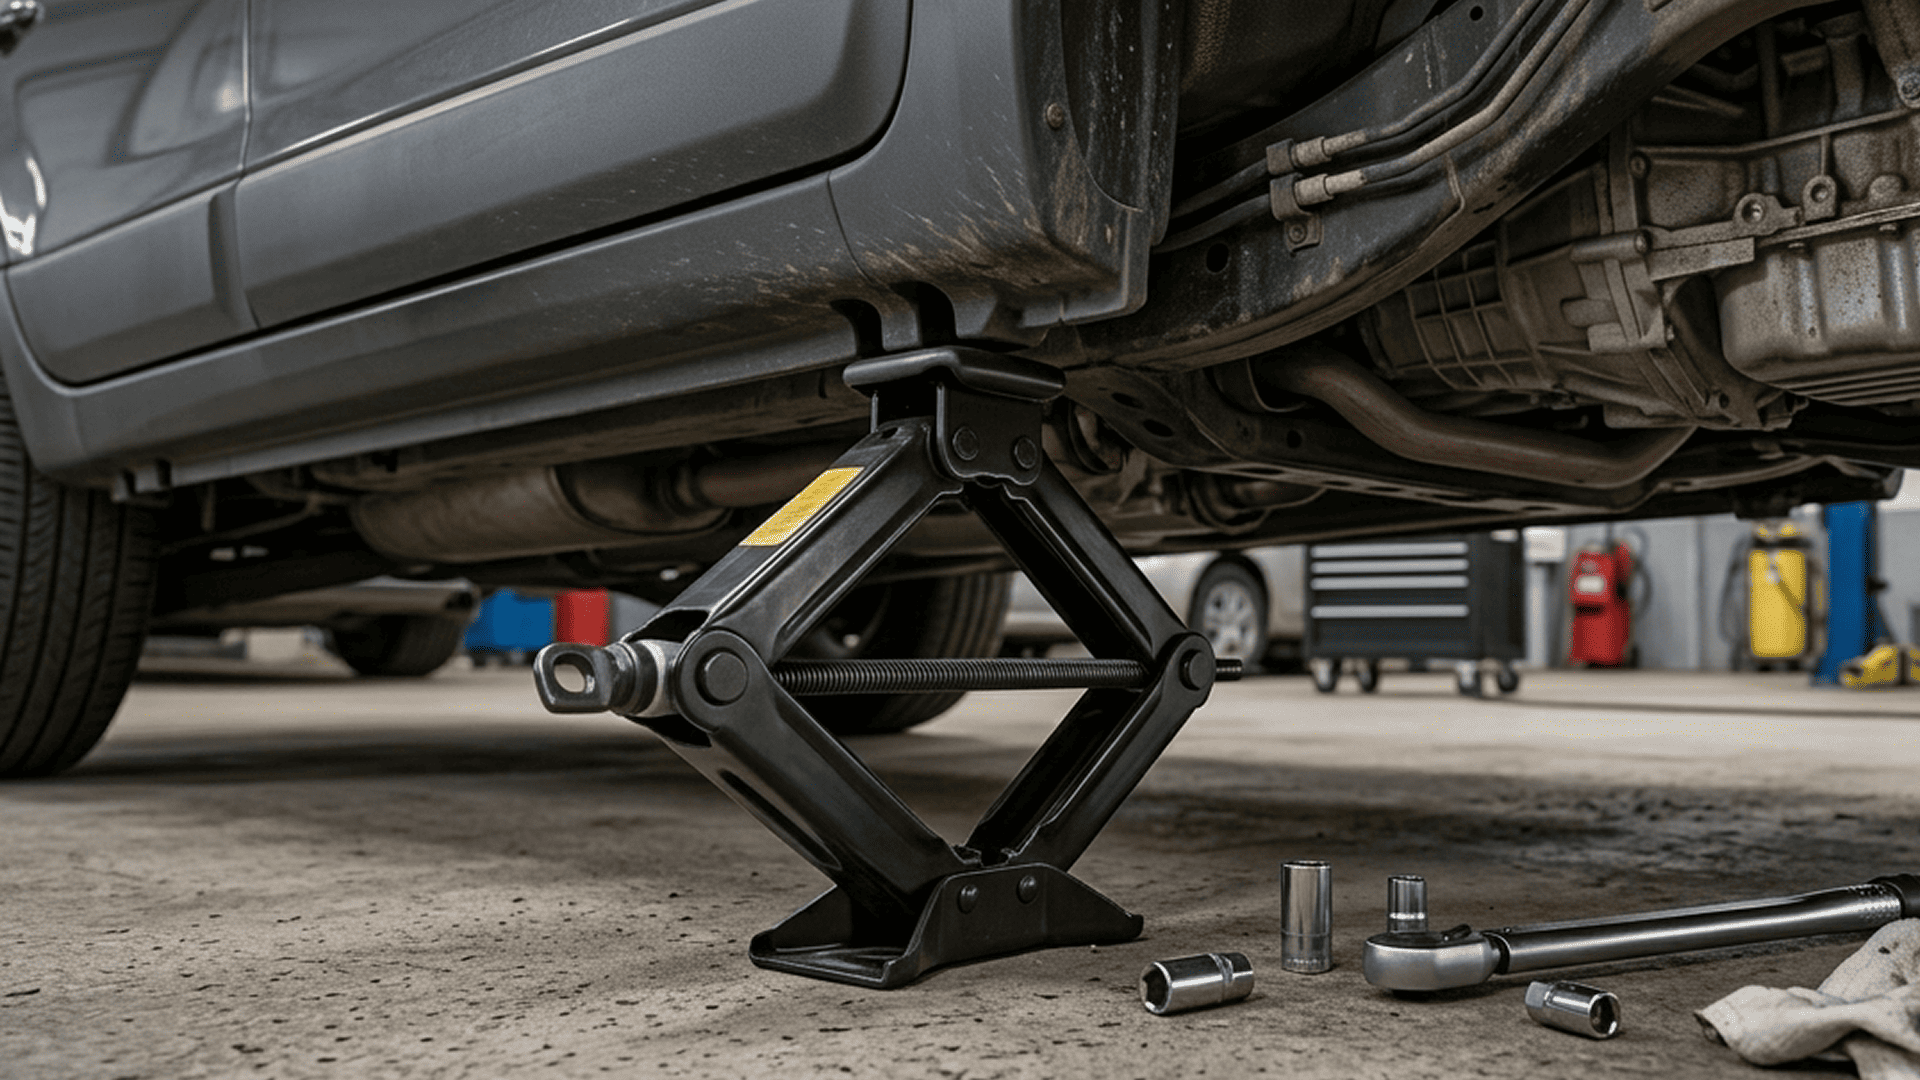
With the lug nuts loosened, it’s time to get the flat tire off the ground. This is the part that feels the most intimidating. You cannot place the jack anywhere under the car. Most of the underside is not strong enough to hold the car’s weight.
Find the jacking point. This is a reinforced spot along the frame, usually just behind the front wheel or in front of the rear wheel. Look for a small metal ridge with two notches. The area between those notches is where the jack goes. Your owner’s manual shows the exact location for your car.
Place the jack directly under this point. Make sure it is straight and on solid ground.
Turn the jack handle clockwise to raise the car. Take a moment to double-check that the top of the jack is fitting securely into the jacking point.
Lift the car only until the flat tire is a few inches off the ground. That is enough. Lifting higher than necessary makes the car less stable.
A gap of two or three inches between the bottom of the tire and the ground is perfect. Stop lifting once you have that clearance. The wheel is now off the ground and bearing no weight, which means you are all set to remove the lug nuts completely and swap out the tire.
Step 5: Swap the Flat Tire for the Spare
Now that the car is safely in the air, you can finish the job of removing the flat tire. Finish unscrewing the lug nuts you loosened earlier and put them somewhere safe, like in a pocket or an upside-down hubcap, so they don’t roll away.
Pull the flat tire straight toward you. It might be a little heavy or stuck on, so a firm, steady pull is best.
For extra safety, slide the flat tire under the car near the jack. If the jack slips, the car will land on the wheel instead of the ground.
Lifting the spare tire into place can be awkward, but the key is alignment. You need to line up the holes in the center of the spare with the threaded bolts sticking out of the car, which are called wheel studs.
Rest the bottom of the tire on your foot or the lowest stud to help support it. Push the tire on until it sits flat against the hub.
With the spare tire sitting flush, it’s time to secure it before lowering the car. Grab the lug nuts you set aside and begin screwing them back onto the wheel studs by hand. Turn them clockwise until they are snug.
You don’t need the wrench for this part; the goal is simply to make sure the wheel is held firmly in place and won’t wobble when you lower the car. Once all the nuts are on and finger-tight, you’re ready to bring the car back down to earth for the final tightening.
Step 6: Secure the Spare Using the Star Pattern
Before you do the final tightening, you need to bring the car back down. First, pull the old flat tire out from underneath the vehicle. Then, turn the jack handle counter-clockwise to slowly and carefully lower the car until the spare tire is firmly on the ground and supporting the car’s full weight.
Attempting to fully tighten the nuts while the car is in the air would just cause the wheel to spin. The weight of the car on the ground is what holds the wheel still so you can apply the necessary force.
Now tighten the lug nuts using the star pattern. This means tightening one nut, then the one directly across from it, and continuing in a crisscross pattern. This pulls the wheel on evenly and prevents it from sitting crooked.
First, go around once and snug each nut. The goal of this first pass is not to get them as tight as humanly possible, but to evenly secure the wheel in place. You should feel the wheel settle into its final position as you snug each nut down.
Then go around again in the same star pattern and tighten them firmly. Use your body weight if needed, but do not jump on the wrench. A strong, steady push is enough. When all the nuts are tight, the wheel is secure.

Step 7: What to Do After the Spare is On
Before you get back behind the wheel, take a moment to clean up. Put the flat tire in the trunk where the spare was. Store the jack and wrench so they do not move around while you drive.
You’ve just completed the hard part of installing a spare tire; this final step ensures you’re ready to drive away safely.
Bear in mind that most spare tires are temporary “donut” tires. They are not a permanent replacement. They are not made for long distances or high speeds.
So with them on, follow the 50/50 rule:
- Do not drive faster than 50 mph (80 km/h)
- Do not drive more than 50 miles (80 km)
A spare tire is only meant to get you to a repair shop. It has less grip and changes how your car handles. Your immediate next step is to drive carefully and go straight to a tire shop or mechanic to repair or replace your original tire.
Common Mistakes Beginners Should Avoid
Avoiding mistakes improves safety and prevents damage to your car or spare tire. Here are the most common errors and how to fix them:
- Forgetting to loosen lug nuts before lifting
Trying to turn tight nuts while the car is in the air can cause the wheel to spin or strip the bolts. Always break the nuts loose while the tire is still on the ground.
- Jacking on unstable or sloped ground
Soft or uneven surfaces can make the jack slip, risking injury and car damage. Always find a flat, solid surface and use wheel chocks for extra stability.
- Not tightening lug nuts evenly
Tightening in a circle can leave the wheel crooked, causing wobble or vibration while driving. Use the star pattern to secure the tire evenly.
- Ignoring tire pressure
A flat or underinflated spare can fail when you need it most. Check your spare’s air pressure before long trips or at least twice a year.
- Skipping the parking brake
A rolling car is a serious hazard. Always engage the brake and put the car in gear or Park before lifting.
5. Lifting the car too high or incorrectly
Raising the car more than necessary or placing the jack off the manufacturer’s jacking point can damage the frame or cause the car to fall. Only lift enough to remove the flat tire and follow your owner’s manual.
By avoiding these common errors, you make the process safer, quicker, and more reliable. Small details like checking your spare, using the star pattern, and ensuring a stable jack setup can prevent accidents and keep your car in good condition.
How Long Does It Take to Change a Tire?
The time needed to change a tire depends on your experience, the type of vehicle, and the tools you have.
If you are changing the tire yourself, it takes 20–30 minutes, depending on how often you do it and the type of vehicle. This covers locating the spare, jack, and lug wrench, setting up a safe workspace, loosening the lug nuts, lifting the car, removing the flat, installing the spare, and tightening the nuts correctly.
If you don’t change the tire yourself, timing depends on professional services. A repair shop usually takes 30–50 minutes, including check-in and installation. Roadside assistance, such as AAA, takes 30–60 minutes (including waiting times) for the tire change.
These services are valuable if the flat occurs in an unsafe location, if you lack a spare, or if conditions make DIY impractical.
Here is a quick overview:
- Do it yourself: 20–30 minutes
- Repair Shop: 30–50 minutes
- Roadside assistance: 30–60 min
Wrap Up
Changing a flat tire is no longer a roadside disaster. With these steps, you can handle it safely: find a level surface, turn on hazard lights, loosen lug nuts before lifting, use the proper jacking point, and tighten the wheel in a star pattern.
To stay ready, check your spare tire’s pressure twice a year at a gas station. A properly inflated spare ensures you can replace a flat quickly and safely whenever it happens.